
Leveling can play a huge role in avoiding downtime, maintaining product quality and consistency, increasing capacity, and lowering operating costs. Machines, especially large machines performing heavy duty jobs, have to contend with shock and vibration that can leave your end product out of spec. Here are some machine leveling best practices to help your equipment stay in tip-top shape.
There are three main leveling methods to consider, listed below in order of passable to best.
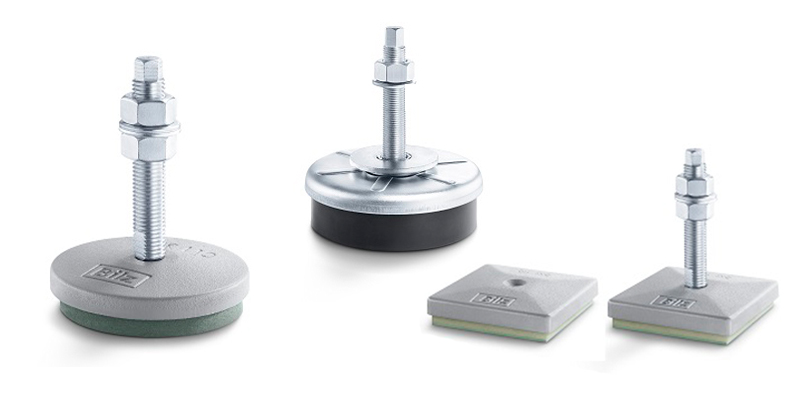
Steel shims- To install, you have to jack up your machine, slide the steel piece underneath, set the machine down, check if it’s level, and if not, do it all over again with a different thickness of steel shim. Rinse and repeat until the machine is level, and finally, bolt to the floor.
Leveling feet- This is a similar process to installing steel shims, except after you jack up your machine to adjust the foot, you take the weight off the foot to turn it. With a shim you have to take them in and out until you find the correct size. Feet are able to be adjusted.
Leveling wedge- The easiest and most accurate installation for wedges. Set the wedges on the floor, set your machine on top of the wedges, and then with full weight of machine on top of wedges adjust the screw on the side of the wedge. It’s accessible and easy to get to, and you can adjust the height up and down at each mounting foot.
If a machine has more than three feet, check to make sure that each of the additional feet are also carrying the load and it is distributed evenly. Check each foot to make sure there is load on each one. If you don’t go this extra step, eventually the machine could overload. (With a wedge, you can do this as a final step by turning the adjusting screw clockwise and ensuring the torque is even on all.)
The goal here is to lower the weight of the machine onto the wedge instead of trying to raise the weight of the machine. These machines are heavy duty and can weigh a ton, so this method prevents you from battling against the machine and instead letting gravity help take the load off a bit! When everything is level turn clockwise to even the torque.
As part of a preventative maintenance schedule, check your level once every six months or once per year. Always adjust the leveling according to the manufacturer’s requirements. And remember there can be several leveling points to account for!
The specifications you need to level to depends on what accuracy you are measuring at. Different processes have different needs. There are several measuring devices you can use to measure the level to see if it’s within spec. Based on the specificity of the measurement required, some common options you might use are laser levels, a machinist level, and digital levels.
Levels are hugely important to keeping parts in spec and machines stable. Use these machine leveling best practices to keep your equipment level and your operations running without a hitch.
Tasked with leveling machines at your factory? Need a little more expert advice? We can help! Click here to get in touch.

